
EEL-5881

Software Engineering Project: Research Expert
Build Instructions |
Research Expert
Build Instructions
EEL-5881, Fall, 2008
Team Name: Team 3
Team Members:
Contents of this Document
SECTION 1: Creating the SQL Server
To create the SQL Server, install a copy of Microsoft SQL 2005. The Express version can be found on Microsoft's web site here. Also, install Microsoft SQL Server Management Studio to be used with SQL 2005. Once both are installed, run the SQL Server Management Studio. If everything is installed with the defaults, then the login screen should be as follows: 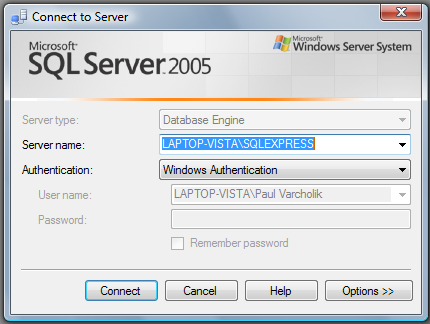
Where Server name is simply localhost or the name of the computer. If SQL Server was installed with a different instance name other than SQLEXPRESS, then simply type in the appropriate instance name as the Server name. The authentication fields are identical to the Windows login fields. Once the SQL server has been accessed from the Management Studio, create a new database by right clicking on Databases and clicking New Database. Name it ResearchExpert. Next, run the included .sql files in the ResearchExpert.Data subfolder as follows:
The stored procedures can be run in any order, as long as they are run after the Tables.sql and Defaults.sql files are executed. When executing .sql files, make sure that the selected database is the ResearchExpert database, as shown circled in red below:
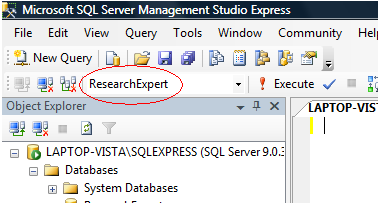
The SQL Server is installed and ready to go once all of the .sql files have been executed.
SECTION 2: Compiling the Application
To compile the ResearchExpert software, install a copy of Visual Studio 2008. Open the solution file Bespoke.ResearchExpert.sln in Visual Studio. Open the file Database.cs. Near the end, on line 158 (As of latest build 11/28/08, line number is subject to change), is the line:
private static readonly string ConnectionString = @"Data Source=localhost\SQLEXPRESS;Initial Catalog=ResearchExpert;Integrated Security=True";
Modify this line if localhost\SQLEXPRESS is not the name of the SQL Server. Also change the name of the Catalog from ResearchExpert to the name of the database created earlier if ResearchExpert was not chosen as the database's name. Once this step is complete, save the modified Database.cs file if necessary. Then hit Build->Build Solution as shown below:
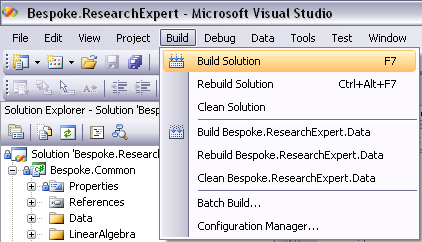
Congratulations! The solution has been compiled.

